


The head gasket plays a crucial role in the engine performance of Mercedes-Benz vehicles, serving as a seal between the engine block and cylinder head. This component is responsible for containing the pressurized combustion gases, as well as coolant and oil within their respective passages. When a head gasket fails, it can lead to significant engine damage and a drop in performance, making timely replacement essential.
Identifying the signs of a blown head gasket is the first step in addressing the issue. Common symptoms include overheating, coolant leaks, white smoke from the exhaust, and milky oil, which is indicative of coolant mixing with engine oil. Recognizing these symptoms early can prevent further damage and potentially save vehicle owners from costly repairs and extensive downtime.
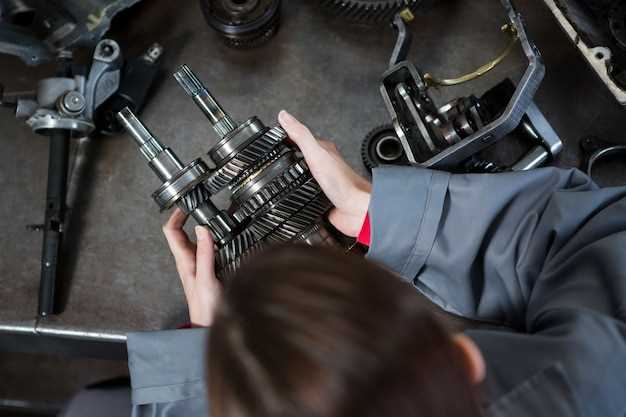
Replacing a head gasket in Mercedes-Benz vehicles is not only a technical challenge but also requires precision and attention to detail. The process involves draining the cooling system, removing the necessary components to access the gasket, and meticulously cleaning the mating surfaces to ensure a proper seal. Utilizing OEM parts and following manufacturer specifications is paramount to achieving optimal performance and longevity after replacement.
In summary, understanding the importance of the head gasket and recognizing early failure signs will help Mercedes-Benz owners maintain the integrity of their engines. This guide will delve into the step-by-step process of replacing head gaskets, offering valuable insights for both DIY enthusiasts and professional mechanics alike.
Identifying Symptoms of Head Gasket Failure in Mercedes-Benz
Recognizing the signs of head gasket failure is crucial for maintaining the performance and longevity of your Mercedes-Benz vehicle. Head gasket issues can lead to severe engine damage if not addressed promptly.
Overheating: One of the primary symptoms of a failing head gasket is engine overheating. If your temperature gauge shows higher than normal readings or if the engine frequently overheats, it may indicate a breach in the head gasket, allowing coolant to escape.
Coolant Leaks: Visible coolant leaks under the vehicle or pooling in the engine bay can signal a head gasket problem. If you notice a sweet smell or puddles of coolant, it’s essential to investigate further, as coolant loss can lead to more severe engine issues.
Engine Misfiring: A blown head gasket can lead to compression loss, resulting in engine misfires. If the vehicle experiences rough idling, stalling, or a noticeable reduction in power, these could be signs of head gasket failure.
Oil and Coolant Contamination: Check the engine oil for a milky or frothy appearance, which can indicate coolant mixing with the oil due to a head gasket leak. Similarly, if you notice oil in the coolant reservoir, it’s a significant red flag pointing towards gasket failure.
Excessive Exhaust Smoke: White smoke from the exhaust can indicate coolant leaking into the combustion chamber. This symptom arises when a head gasket is compromised, leading to burnt coolant, which produces white smoke during combustion.
Loss of Power: A significant drop in engine power and efficiency can be attributed to head gasket failure. The engine may struggle to maintain speed, especially under load, signaling that the gasket’s integrity has been compromised.
Unusual Engine Noises: If you hear knocking or unusual sounds from the engine bay, it could indicate abnormal pressure or coolant loss. These noises could arise due to inadequate lubrication caused by coolant leaking into the oil system.
Timely identification of these symptoms is essential for preventing extensive damage to your Mercedes-Benz engine. Regular maintenance and vigilance can help you recognize potential head gasket issues early, allowing for necessary repairs before serious problems arise.
Step-by-Step Process for Removing and Replacing the Head Gasket
Start by ensuring the engine is cool and disconnect the battery to prevent any electrical issues. Drain the engine coolant by removing the drain plug or radiator cap, and collect it in a suitable container.
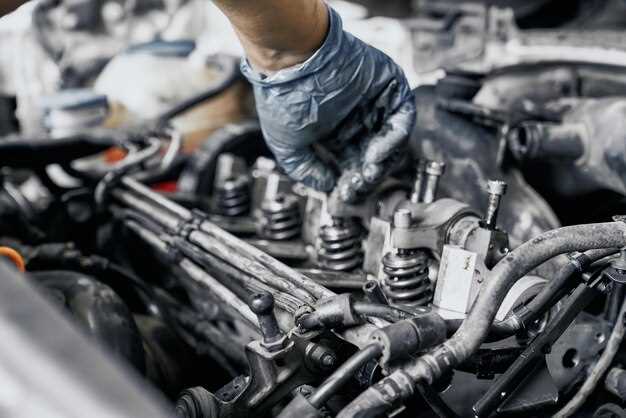
Next, remove the engine cover to access the cylinder head. This usually involves unscrewing several bolts that secure the cover in place. Take care to note the placement of any hoses or wiring that may need to be disconnected.
Proceed to disconnect any components obstructing access to the cylinder head, such as the intake manifold, exhaust manifold, and any associated sensors or wiring harnesses. Label hoses and connections to simplify reassembly.
Once you have clear access to the cylinder head, unscrew the head bolts in a specific pattern to prevent warping the head. Consult the vehicle’s service manual for the correct sequence and torque specifications. Carefully lift the cylinder head off the engine block. Check for any signs of damage or warping on both the cylinder head and engine block.
Next, remove the old head gasket, ensuring that no debris remains on the surfaces. Clean both the cylinder head and engine block thoroughly using a suitable cleaner, and a scraper if necessary, to ensure proper sealing for the new gasket.
Position the new head gasket onto the engine block, ensuring that it aligns correctly with the bolt holes and coolant passages. Carefully place the cylinder head back onto the gasket, avoiding any misalignment.
Tighten the head bolts in the specified sequence to the recommended torque settings, often in multiple stages to ensure even pressure across the gasket. Refer to the service manual for exact specifications.
Once the head is securely fastened, reassemble any components that were removed, such as the intake and exhaust manifolds, and reconnect any wiring or hoses that were previously disconnected.
Refill the engine coolant to the specified level, reconnect the battery, and double-check all bolts and connections to ensure nothing is overlooked. Start the engine and let it run for a few minutes while checking for any leaks or unusual noises, indicating proper installation.
Common Mistakes to Avoid During Head Gasket Replacement
Replacing a head gasket in a Mercedes-Benz vehicle is a complex task that requires precision and attention to detail. Avoiding common mistakes can save time and prevent further damage to the engine.
One frequent mistake is not thoroughly cleaning the mating surfaces before installation. Residual gasket material, dirt, and oil can compromise the seal, leading to leaks. Always use a suitable cleaning solution and a scraper to remove any old gasket material and ensure a smooth, clean surface.
Failing to properly torque the head bolts is another critical error. Each bolt must be tightened to the manufacturer’s specifications in the correct sequence. Neglecting this step can result in uneven pressure, causing the gasket to fail prematurely. It’s important to use a calibrated torque wrench and follow the specific torque pattern outlined in the repair manual.
Ignoring the condition of neighboring components is also a mistake. If the engine has been overheating or the gasket has failed due to other issues, components like the cylinder head may be warped or cracked. Always inspect these parts for damage and replace them if necessary to ensure the longevity of the repair.
Using the wrong type of gasket is another oversight that could lead to complications. Be sure to use the OEM (Original Equipment Manufacturer) parts or high-quality aftermarket gaskets designed specifically for your model. Incompatible materials can lead to gasket failure and significant engine damage.
Lastly, neglecting to bleed the cooling system after the installation can cause air pockets, leading to overheating. Make sure to follow the appropriate procedure for bleeding the cooling system to ensure that the engine operates within safe temperature limits.


