


Maintaining your vehicle is essential for both performance and safety, especially when it comes to European imports that often require specialized attention. One of the crucial components that may need replacement over time is the brake rotor. This guide will walk you through the process of replacing rotors on various European models, ensuring your vehicle operates at its best.
Understanding Brake Rotors is the first step in this process. Brake rotors play a significant role in your vehicle’s braking system, providing the necessary surface for brake pads to clamp down on. Over time, these components can wear out, warp, or develop grooves, leading to decreased braking performance and potential safety hazards.
In this guide, we will cover the tools required, the step-by-step procedure for rotor replacement, and some tips for ensuring a smooth installation. Whether you’re a seasoned mechanic or a DIY enthusiast, following these steps will help you successfully replace your vehicle’s rotors and achieve optimal braking efficiency.
Choosing the Right Rotors for Your Specific European Vehicle
When replacing brake rotors on European vehicles, it is crucial to choose the appropriate rotors that match your car’s specifications and performance requirements. European cars often have unique designs and engineering standards, which necessitate careful selection.
1. Understand OEM Specifications: Always begin your search by referencing the Original Equipment Manufacturer (OEM) specifications for your vehicle. This information can typically be found in the owner’s manual or through the manufacturer’s official website. OEM rotors are designed to fit perfectly and perform optimally with your specific make and model.
2. Consider Rotor Types: Different types of rotors are available, including solid, vented, and slotted varieties. European vehicles frequently utilize vented rotors for better heat dissipation. Depending on your driving style, it may be beneficial to consider performance rotors that offer enhanced stopping power and heat resistance.
3. Material Selection: The material of the rotor affects performance and durability. Cast iron is common, but for high-performance models, consider carbon composite or drilled rotors that provide weight savings and improved heat management. Ensure that the material aligns with your driving needs and the road conditions typically faced.
4. Verify Compatibility: Always cross-reference the parts with your vehicle’s VIN (Vehicle Identification Number) to ensure compatibility. Some European models may have variations even within the same model year, and using incorrect rotors can lead to performance issues.
5. Performance Needs: Assess how you use your vehicle. If you frequently drive in demanding conditions, like high speeds or frequent stops, opt for rotors designed for performance. Conversely, if your driving is mostly city-based with moderate speeds, standard rotors may suffice.
6. Trusted Brands: Choose rotors from reputable brands known for quality and reliability in the automotive industry. Brands specializing in European vehicles will have more precise offerings tailored to your car’s needs, ensuring both safety and performance.
7. Installation Considerations: When selecting rotors, also consider whether you will be installing them yourself or relying on a mechanic. Certain designs may require specialized tools or knowledge for installation, which can influence your purchasing decision.
By carefully evaluating these key factors, you can confidently select the right rotors for your European vehicle, ensuring optimal performance and safety on the road.
Tools and Equipment Needed for Rotor Replacement
To successfully replace rotors on European imports, you will need various tools and equipment. Ensuring you have everything ready before starting the job will help streamline the process and prevent any interruptions.
Essential Tools
- Jack and Jack Stands: A hydraulic floor jack is ideal for lifting the vehicle, and sturdy jack stands are essential for safety while working beneath the car.
- Wheel Wrench: A wheel wrench or lug nut wrench is necessary for removing the wheel bolts, allowing access to the brakes and rotors.
- Socket Set: A comprehensive socket set, including metric sizes, is important for loosening and tightening rotor bolts.
- Torque Wrench: This tool ensures that all bolts are secured to the manufacturer-specified torque, preventing any future issues.
- C-Clamp or Brake Tool: A C-clamp can be used to compress the brake caliper piston when installing new rotors.
Additional Equipment
- Brake Cleaner: Use brake cleaner to clean the rotors and eliminate any grease or debris before installation.
- Anti-Seize Compound: Applying anti-seize compound to the rotor hub can help avoid corrosion and make future removal easier.
- Gloves and Safety Glasses: Wear protective gear to safeguard against dust, debris, and potential injury during the process.
Optional Tools
- Pneumatic Tools: If available, pneumatic wrenches can speed up the removal and installation of bolts.
- Brake Pad Spreader: This tool simplifies the process of retracting the caliper pistons but is not mandatory.
- Diagnostic Tool: For vehicles with advanced braking systems, a diagnostic tool may be necessary to reset sensor alerts after rotor replacement.
Gathering the right tools and equipment is crucial for a smooth rotor replacement process. Always refer to your vehicle’s service manual for any specific requirements related to your European import.
Safe Removal and Installation Techniques for Rotors
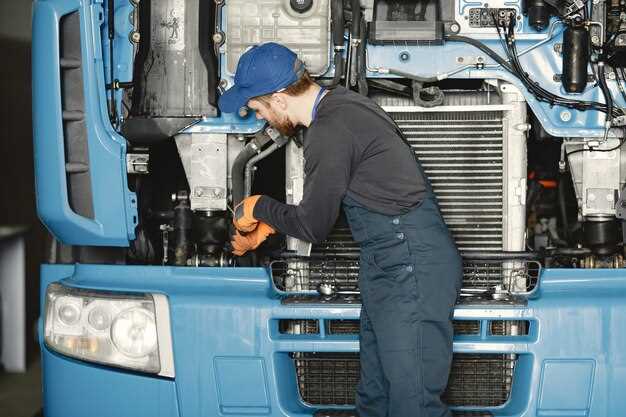
Replacing rotors requires careful handling to ensure both safety and proper functionality. Follow these techniques for safe removal and installation:
Preparation: Before starting, gather all necessary tools, including a jack, jack stands, lug wrench, rotor puller (if applicable), and replacement rotors. Ensure the vehicle is parked on a flat surface, and the parking brake is engaged.
Removing the Wheel: Loosen the lug nuts slightly while the wheel is still on the ground. Then, raise the vehicle using a jack and securely place jack stands underneath for safety. Completely remove the lug nuts and take off the wheel.
Caliper Removal: To access the rotor, remove the brake caliper. Locate the caliper bolts, which are usually found on the back side of the caliper. Using the appropriate socket, carefully unscrew the bolts. Support the caliper with a bungee cord or rope to avoid straining the brake line.
Removing the Rotor: If the rotor is held in place by screws, remove them with a screwdriver. If the rotor does not come off easily, use a rotor puller to avoid damaging the hub assembly. Inspect the hub for wear or damage before proceeding.
Installing the New Rotor: Clean the mounting surface of the hub to ensure a secure fit. Place the new rotor onto the hub, aligning it with any guide pins or holes. If it uses screws, reinstall them to secure the rotor in place.
Reattaching the Caliper: Carefully position the brake caliper back over the rotor and align it with the mounting points. Reinsert and tighten the caliper bolts, ensuring they are secured to the manufacturer’s specifications. This prevents potential movement and brake failure.
Reinstalling the Wheel: Place the wheel back onto the hub, aligning it with the lug bolts. Hand-tighten the lug nuts, then lower the vehicle to the ground. Once on the ground, use a torque wrench to tighten the lug nuts to the appropriate torque setting.
Final Checks: After installation, pump the brake pedal several times to seat the brake pads against the new rotor. Check for any unusual noises or vibrations during a slow test drive, ensuring everything is functioning correctly.


