


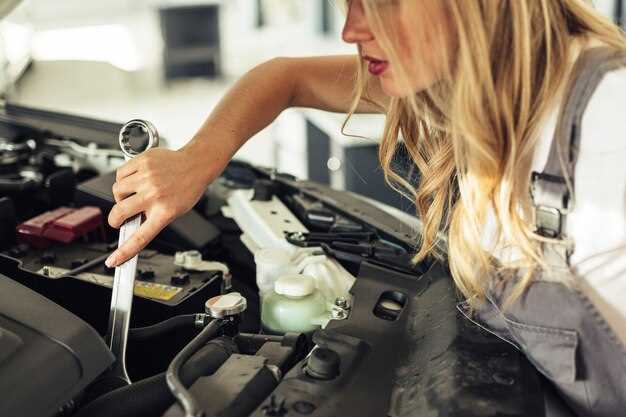
Diagnosing starter issues in foreign cars can be a daunting task for many vehicle owners. Unlike domestic models, foreign cars often come with unique electrical systems and components that require specialized knowledge for accurate troubleshooting. Understanding the nuances of these systems is crucial for effective diagnosis and repair.
The starter system is essential for engine operation, as it initiates the combustion process. When a foreign car fails to start, it may not always indicate a problem with the starter itself; issues can stem from the battery, ignition switch, or wiring. Thus, a systematic approach is necessary to pinpoint the exact cause of the malfunction.
Through this guide, we will explore a step-by-step method for diagnosing starter issues in foreign cars. We will focus on common symptoms, essential tools required for the diagnosis, and effective techniques to identify whether the starter, battery, or other components are at fault. By following these guidelines, you can save time and resources while ensuring your vehicle is back on the road smoothly and efficiently.
Identifying Symptoms of a Failing Starter in Foreign Vehicles
Recognizing the early signs of a failing starter is crucial for avoiding unexpected breakdowns in foreign vehicles. The starter is an essential component that initiates the engine’s operation, and when it begins to fail, certain symptoms will manifest.
One of the most common symptoms is a clicking noise when turning the ignition key. This often indicates that the starter motor is not functioning properly or there is insufficient power to engage the starter. If the engine does not crank but you hear a repeated clicking sound, it is likely a starter or battery issue.
Another noticeable sign is the engine cranking slowly or not cranking at all. When the starter motor is failing, it may struggle to turn the engine over, resulting in a sluggish response. This could also stem from a weak battery, but if the battery is in good condition, the starter itself may be at fault.
Additionally, you may notice a burning smell or the presence of smoke coming from the engine compartment. This can indicate overheating components within the starter, which is a critical warning sign that should not be ignored.
Sometimes, the starter may engage intermittently. You might experience a situation where the engine starts fine one moment and fails to start the next. This inconsistency can be attributed to internal faults within the starter that cause it to fail sporadically.
Finally, if the dashboard lights dim significantly during startup attempts, this could suggest that the starter is drawing excessive current, affecting the overall electrical system. This symptom often accompanies other issues but is a telling sign that the starter should be inspected.
Being aware of these symptoms can help vehicle owners take timely action, preventing further damage and ensuring reliable vehicle operation.
Testing the Starter Motor and Its Electrical Connections
To diagnose starter issues effectively, it is essential to test the starter motor and its associated electrical connections. This process involves several key steps to ensure proper functionality.
1. Preliminary Checks: Before testing the starter motor, make sure the vehicle’s battery is fully charged and in good condition. A weak battery can mimic starter issues. Check the battery terminals for corrosion and ensure they are tightly connected.
2. Inspect Electrical Connections: Begin by visual inspection of the wiring harness connected to the starter motor. Look for frayed wires, loose connections, or signs of wear. Pay particular attention to the positive and negative cables, as poor connections can prevent the starter from receiving adequate power.
3. Voltage Testing: Use a multimeter to measure the voltage at the starter motor. With the ignition switch in the “start” position, check for voltage between the battery terminal on the starter and the ground. A reading of 10 volts or higher indicates that the starter motor is receiving sufficient power.
4. Ground Connection Check: A faulty ground connection can cause the starter to malfunction. Test the ground wire and connection to the chassis. Ensure there is no corrosion, and use a multimeter to verify continuity between the ground and the starter motor.
5. Starter Motor Bench Test: If the above tests are satisfactory, you can remove the starter motor for a bench test. Connect the starter directly to a power source using jumper cables. If it spins freely and engages the gear, it is likely functioning well. If it does not operate, the starter may need to be replaced.
6. Solenoid Functionality: When testing the starter motor, also check the solenoid that activates it. A faulty solenoid may click but not engage the starter. Ensure the solenoid is receiving power and performing its function correctly.
By following these testing procedures, you can accurately diagnose starter motor issues and identify any electrical connection problems that may be affecting performance. Once diagnosed, appropriate repairs or replacements can be carried out to restore functionality.
Common Solutions for Starter Problems in Import Cars

When dealing with starter issues in import cars, it is important to follow systematic troubleshooting steps to identify and resolve the problem. Here are some common solutions that can help you tackle starter-related issues effectively.
Check the Battery Voltage: A weak or dead battery is often the first culprit in starter problems. Use a multimeter to check the battery voltage. It should read around 12.6 volts when fully charged. If it’s below this threshold, consider recharging or replacing the battery.
Inspect Battery Connections: Corroded or loose battery terminals can impede electrical flow. Ensure that the connections are clean and tight. Remove any corrosion with a mixture of baking soda and water, followed by thorough rinsing and drying.
Test the Starter Relay: The starter relay sends power to the starter motor. If it fails, the starter may not receive the necessary voltage to engage. Locate the relay, usually found in the fuse box, and test it by swapping it with another relay of the same type. If the problem resolves, replace the faulty relay.
Examine Wiring and Connections: Damaged or frayed wires can disrupt current flow to the starter. Carefully inspect the wiring harness for any signs of wear. Repair or replace any damaged wires as needed to ensure a solid electrical connection.
Assess the Ignition Switch: A malfunctioning ignition switch can prevent the starter from engaging. To test it, turn the key to the ‘start’ position and check for voltage at the starter terminal. If there is no voltage, the ignition switch may require replacement.
Inspect the Starter Motor: If the above steps do not resolve the issue, the starter motor itself may be defective. Listen for clicking sounds when attempting to start the engine. If you hear nothing, remove the starter and bench test it. If the motor does not operate, it will need to be replaced.
Consider the Gear Shift Position: For automatic transmission vehicles, ensure that the gear shift is in ‘Park’ or ‘Neutral.’ If not, the safety interlock might prevent the starter from engaging. Adjust the gear shift and try starting the engine again.
Consult a Professional Mechanic: If none of the above solutions resolve the starter problem, it may be time to consult a qualified mechanic. Professionals can perform comprehensive diagnostics and pinpoint more complex electrical issues that may not be immediately apparent.


